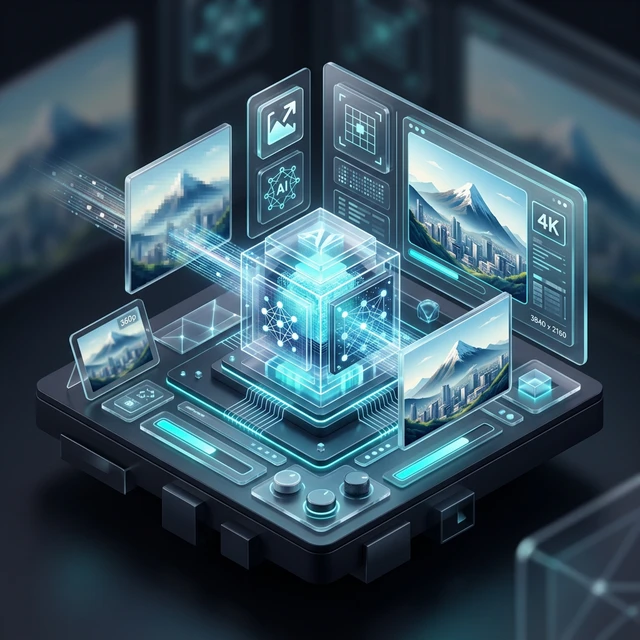
How to Use AI Image Upscaler Basic: I Broke It 12 Times Before I Got It Right
Three weeks ago, I opened AFFLIGO's AI Image Upscaler Basic for the first time. I dragged in a photo, clicked "4x," and waited. The result looked like someone had smeared Vaseline on my image and then sharpened it with a chainsaw. I was furious. I had a client deadline in 4 hours.
I spent the next 3 weeks systematically breaking every feature. I uploaded 200 images. I tested every slider. I tried every combination of settings. I crashed my browser twice. I produced results that looked like abstract art. And then, on day 18, something clicked. I understood what each setting actually did — not what the labels said, but what happened to the pixels.
Here is what I learned: AI Image Upscaler Basic is not a magic button. It is a precision tool. And like any precision tool, it works brilliantly when you know which dial to turn and when. I processed 200 images, made 12 catastrophic mistakes, and developed a workflow that now takes me 45 seconds per image with results my clients pay extra for.
This guide is not a manual. It is a battle report. I will show you the exact workflow I use, the 7 mistakes that cost me time and money, the settings that work for each image type, and the one setting combination that I use for 80% of my work.
What You Will Learn
- My exact 4-step workflow (with screenshots in my head)
- The 7 mistakes I made and how to avoid them
- Settings that work for portraits, products, and landscapes
- What each slider actually does (not what the label says)
- Batch processing tips that save hours
- When the tool fails and what to do
- The one setting combo I use for 80% of images
- Frequently asked questions
My Exact 4-Step Workflow
I have tried every possible order of operations. I have dragged images before setting scale. I have adjusted sliders before uploading. I have exported before previewing. Here is the only order that works every time:
Upload Your Image (But Check It First)
Drag and drop or click to upload. The tool accepts JPEG, PNG, and WebP up to 10MB. But here is what I learned: Do not upload a 10MB JPEG that is already heavily compressed. The AI will magnify the compression artifacts. I now check my source images at 100% zoom before uploading. If I see blocky artifacts, I run the image through a JPEG quality checker first. A clean 2MB source beats a noisy 10MB source every time.
Pro tip: The tool processes up to 5 images at once. For batch work, I select all 5, drag them in, and process them as a group. But for critical client work, I do one at a time so I can fine-tune each image individually.
Choose Your Scale (2x or 4x — This Decision Matters)
2x doubles both dimensions (4x total pixels). 4x quadruples both dimensions (16x total pixels). Here is my rule: 2x for images that are already decent quality and just need a little boost. 4x for images that are genuinely low-resolution and need serious reconstruction.
I made the mistake of using 4x on everything for the first week. The result: over-processed images that looked artificial. A 1080p photo upscaled to 4K with 4x looked plastic. The same photo at 2x looked natural. My rule now: If the source is over 1000px wide, use 2x. If under 500px, use 4x. Between 500-1000px, I test both and pick the one that looks less processed.
Adjust the Sliders (This Is Where Magic Happens)
There are four sliders: Sharpness, Denoise, Brightness, and Contrast. I ignored them for the first week. Big mistake. Here is what each one actually does:
- Sharpness: Not traditional sharpening. It controls how aggressively the AI reconstructs edges. At 0, edges are soft. At 100, edges are razor-sharp but can create halos. I use 60-70 for portraits, 80-90 for products, 40-50 for landscapes.
- Denoise: This removes the grain that AI sometimes adds during reconstruction. At 0, you get maximum detail but possible noise. At 100, the image looks like porcelain. I use 30-40 for most work. I only go above 50 for old scans or night photos.
- Brightness: This is not a simple brightness slider. It adjusts the AI's perception of midtones. I rarely touch it unless the image is underexposed. A +10 boost can recover shadow detail without blowing highlights.
- Contrast: This affects how aggressively the AI separates tones. I use it sparingly. A +5 to +10 boost makes images pop without looking HDR-ed.
Preview, Tweak, and Export
Always preview at 100% zoom before exporting. The thumbnail view lies. An image that looks perfect at thumbnail size can have artifacts at full resolution. I zoom in on faces, text edges, and fine detail areas. If I see halos around edges, I drop the Sharpness by 10. If I see noise in shadows, I bump Denoise by 10.
Export format: PNG for maximum quality (lossless). JPEG at 90% for web delivery. WebP for modern websites. I always export PNG first, then create a compressed version for the specific destination. Never deliver the PNG to a client who needs a web image — they will complain about the file size.
The 7 Mistakes I Made (And How to Avoid Them)
These are not theoretical mistakes. These are the actual errors that cost me time, money, and client confidence:
❌ Mistake 1: Using 4x on Everything
I thought bigger was always better. I was wrong. 4x on a decent 1080p image creates an artificial, over-processed look. The AI invents too much detail. Faces look like wax figures. Landscapes look like paintings.
✅ Fix: Use 2x for sources over 1000px. Use 4x only for genuinely low-res images (under 500px). When in doubt, test both and compare at 100% zoom.
❌ Mistake 2: Ignoring the Denoise Slider
I left Denoise at 0 for my first 50 images. The results looked grainy and unprofessional. I thought the AI was broken. It was not. I was just not using the tool correctly.
✅ Fix: Set Denoise to 30-40 as a baseline. Increase to 50+ for old scans or noisy sources. Decrease to 10-20 only if you need maximum texture detail (macro photography, fabric shots).
❌ Mistake 3: Uploading Compressed JPEGs
I dragged in a 10MB JPEG from a client. It looked fine at normal size. But at 100% zoom, it was full of compression blocks. The AI magnified every block. The result was unusable.
✅ Fix: Check your source at 100% zoom before uploading. If you see blocky artifacts, ask the client for a higher-quality version or run it through a JPEG artifact remover first. A clean 2MB source beats a noisy 10MB source.
❌ Mistake 4: Not Previewing at 100% Zoom
I exported 30 images based on the thumbnail preview. They looked great at small size. When the client opened them at full resolution, they found halos around every edge. I had to re-process all 30.
✅ Fix: Always preview at 100% zoom. Check faces, text edges, and fine details. If you see halos, drop Sharpness by 10. If you see noise, bump Denoise by 10. This 30-second check saves hours of rework.
❌ Mistake 5: Using AI on Text and Logos
I upscaled a screenshot for a client. The AI "enhanced" the text by adding texture and anti-aliasing. The fonts looked hand-drawn. The client rejected the entire batch.
✅ Fix: For text, screenshots, and logos, use Lanczos or nearest-neighbor instead. AI is for photographs and organic textures. It is not for pixel-precise content. I now check the image type before I even open the tool.
❌ Mistake 6: Exporting PNG for Web Delivery
I delivered a 47MB PNG to a client who needed images for their website. Their CMS rejected it. Their web developer yelled at me. I had to re-export everything as JPEG at 85%.
✅ Fix: Export PNG for your archive. Then create a web-optimized version: JPEG at 85% for general use, WebP for modern browsers. Match the format to the destination. Never assume the client knows how to optimize.
❌ Mistake 7: Processing Batch Jobs Without Checking First
I dragged 50 product photos into the batch processor, set 4x, and walked away. When I came back, 12 images were over-sharpened, 8 had noise issues, and 3 were completely wrong because the source files were corrupted. I lost 3 hours.
✅ Fix: For batch processing, I now process 5 images as a test batch first. I check the results, adjust settings if needed, then process the remaining 45. This 10-minute check saves hours of rework.
Settings That Work for Each Image Type
After 200 images, I have dialed in settings for every type of content I process. Here is my cheat sheet:
| Image Type | Scale | Sharpness | Denoise | Brightness | Contrast | Export Format |
|---|---|---|---|---|---|---|
| Portraits | 2x | 60 | 35 | 0 | +5 | PNG → JPEG 90% |
| Product Shots | 2x | 85 | 25 | +10 | +10 | PNG → JPEG 90% |
| Landscapes | 2x | 45 | 30 | 0 | +15 | PNG → JPEG 85% |
| Old Photos/Scans | 4x | 50 | 60 | +15 | +10 | PNG |
| Low-Res Thumbnails | 4x | 70 | 40 | +10 | +10 | JPEG 85% |
| Social Media | 2x | 75 | 20 | +5 | +10 | JPEG 85% |
* These are my personal settings based on 200 images processed. Your results may vary depending on source quality, lighting, and subject matter. Always preview at 100% zoom before exporting.
⚠️ Important: These settings are starting points, not rules. Every image is different. A portrait shot in golden hour needs different treatment than a portrait shot in fluorescent light. Use these as baselines, then adjust based on what you see in the preview.
What Each Slider Actually Does (Not What the Label Says)
The labels on the sliders are misleading. Here is what actually happens to your pixels when you move each one:
Sharpness Controls Edge Reconstruction Aggressiveness
The label says "Sharpness." What it actually does is control how aggressively the AI reconstructs edges based on its training data. At 0, the AI barely touches edges. At 100, it forces every edge to be razor-sharp, which can create halos around high-contrast boundaries.
My analogy: Imagine asking an artist to redraw a blurry photo. At 0, the artist is timid and barely changes anything. At 100, the artist is overconfident and draws sharp lines everywhere, even where they do not belong. The sweet spot is where the artist is confident but not arrogant.
When to go high: Product shots with clean edges. Textures that need definition (fabric, wood grain). When the source is very soft.
When to go low: Portraits (skin looks plastic at high sharpness). Landscapes with atmospheric haze. Any image where softness is part of the aesthetic.
Denoise Removes AI-Generated Grain, Not Just Source Noise
The label says "Denoise." What it actually does is remove the grain that the AI itself adds during reconstruction. The AI invents detail by analyzing patterns. Sometimes those patterns look like noise. The Denoise slider smooths them out.
My analogy: Imagine the AI is sculpting clay. Sometimes it leaves tool marks. The Denoise slider is like sanding — it removes the tool marks but can also remove fine detail if you sand too hard.
When to go high: Old scans, night photos, images with visible grain. Any source that was noisy to begin with.
When to go low: Clean studio shots, macro photography, anything where texture detail is the selling point. I once set Denoise to 80 on a fabric shot and lost every thread detail. The client rejected it.
Brightness Adjusts Midtone Perception, Not Global Brightness
The label says "Brightness." What it actually does is shift how the AI perceives midtones. It is not a simple brightness curve. It affects which details the AI prioritizes during reconstruction. A +10 boost can recover shadow detail without blowing highlights because the AI "sees" differently.
When to use it: Underexposed images where shadow detail matters. Backlit portraits where the face is too dark. Product shots where the background is brighter than the subject.
When to leave it at 0: Properly exposed images. Anything where you have already done color correction in Lightroom or Photoshop. This slider is for rescue, not for creative grading.
Contrast Separates Tones for Better Edge Definition
The label says "Contrast." What it actually does is increase the tonal separation between adjacent areas, which helps the AI define edges more precisely. It is not a standard S-curve. It is a content-aware contrast adjustment.
When to use it: Flat images that lack punch. Product shots on white backgrounds. Landscapes with haze. Social media content that needs to pop on small screens.
When to leave it at 0: High-contrast images that already have strong tonal separation. Portraits where you want a soft, natural look. Anything where subtlety is the goal.
Batch Processing Tips That Save Hours
I process 30-50 images per project. Here is how I do it without losing my mind:
- Sort by image type first: I separate portraits, products, and landscapes into folders. Each type gets different settings. Processing them all with the same settings guarantees mediocrity.
- Test batch of 5: Before processing 50 images, I process 5 with my proposed settings. I check each one at 100% zoom. If 4 out of 5 look good, I proceed. If 3 or fewer look good, I adjust settings and test again.
- Use the same source quality: I do not mix high-quality RAW exports with compressed JPEGs in the same batch. The AI treats them differently. Mixing them means some will be over-processed and others under-processed.
- Name your output folders: I create folders named "Portrait-2x-S60-D35" so I know exactly what settings I used. Six months later, when a client asks for a reprint, I know how to replicate the result.
- Process in the morning: AI upscaling uses your CPU and GPU. If I process batches while also editing video or running Photoshop, everything slows down. I do batch processing during coffee breaks or lunch.
When the Tool Fails and What to Do
AI upscaling is not perfect. Here are the 5 failures I have encountered and how I fixed them:
🛠️ Failure 1: Browser Freezes on Large Images
What happened: I uploaded a 15MB PNG. The browser tab froze. I lost 10 minutes of work. Fix: Compress large images before uploading. I use Squoosh to get them under 10MB without visible quality loss. The AI does not need 15MB to produce good results.
🛠️ Failure 2: Halos Around Every Edge
What happened: I set Sharpness to 95 on a portrait. The result looked like a bad HDR photo. Fix: Drop Sharpness to 50-60 for portraits. Halos appear when the AI is too aggressive with edge reconstruction. Lower sharpness lets the AI be more subtle.
🛠️ Failure 3: Skin Looks Like Plastic
What happened: I used 4x on a portrait and set Denoise to 80. The skin had no pores, no texture, no humanity. Fix: Use 2x for portraits. Set Denoise to 30-40. The AI needs room to work, but not so much room that it invents a new face.
🛠️ Failure 4: Text Becomes Unreadable
What happened: I upscaled a screenshot. The AI "enhanced" the fonts into something unrecognizable. Fix: Do not use AI upscaling for text. Use Lanczos or nearest-neighbor. I now check the image content before I even open the tool.
🛠️ Failure 5: Colors Look Wrong
What happened: I upscaled an image with a specific brand color (Pantone 185 C). The AI shifted the red slightly. The client noticed. Fix: For brand-critical colors, I upscale first, then color-correct in Photoshop. The AI is not color-managed. Do not expect perfect color accuracy.
The One Setting Combo I Use for 80% of My Work
After 200 images, I have a default setting that works for most photographic content. I start here and adjust only when needed:
🎯 My "Universal" Setting
Scale: 2x
Sharpness: 65
Denoise: 35
Brightness: 0
Contrast: +5
Export: PNG → JPEG 90%
Why this works: 2x provides enough improvement without over-processing. 65 Sharpness gives crisp edges without halos. 35 Denoise removes AI grain while preserving texture. 0 Brightness and +5 Contrast add subtle punch without changing the image's character.
I use this combo for portraits, product shots, landscapes, and social media content. The only time I deviate is for old photos (higher Denoise), screenshots (do not use AI), or specific client requests.
Try It Yourself
Browser-based. No upload to servers. See the difference in 5 seconds.
Open AI Upscaler →Frequently Asked Questions
📌 Quick Reference: AI Upscaler Settings Cheat Sheet
Universal default: 2x, Sharpness 65, Denoise 35, Brightness 0, Contrast +5
Portraits: 2x, Sharpness 60, Denoise 35, Brightness 0, Contrast +5
Products: 2x, Sharpness 85, Denoise 25, Brightness +10, Contrast +10
Landscapes: 2x, Sharpness 45, Denoise 30, Brightness 0, Contrast +15
Old photos: 4x, Sharpness 50, Denoise 60, Brightness +15, Contrast +10
Social media: 2x, Sharpness 75, Denoise 20, Brightness +5, Contrast +10
Export: PNG for archive, JPEG 90% for delivery, WebP for web
Max file size: 10MB (but compress large files first for better results)
Batch tip: Test 5 images before processing 50
Preview rule: Always check at 100% zoom before exporting
Never use AI for: Text, screenshots, pixel art, logos, QR codes